Category

Tutorial

Double-Blind Clinical Trials

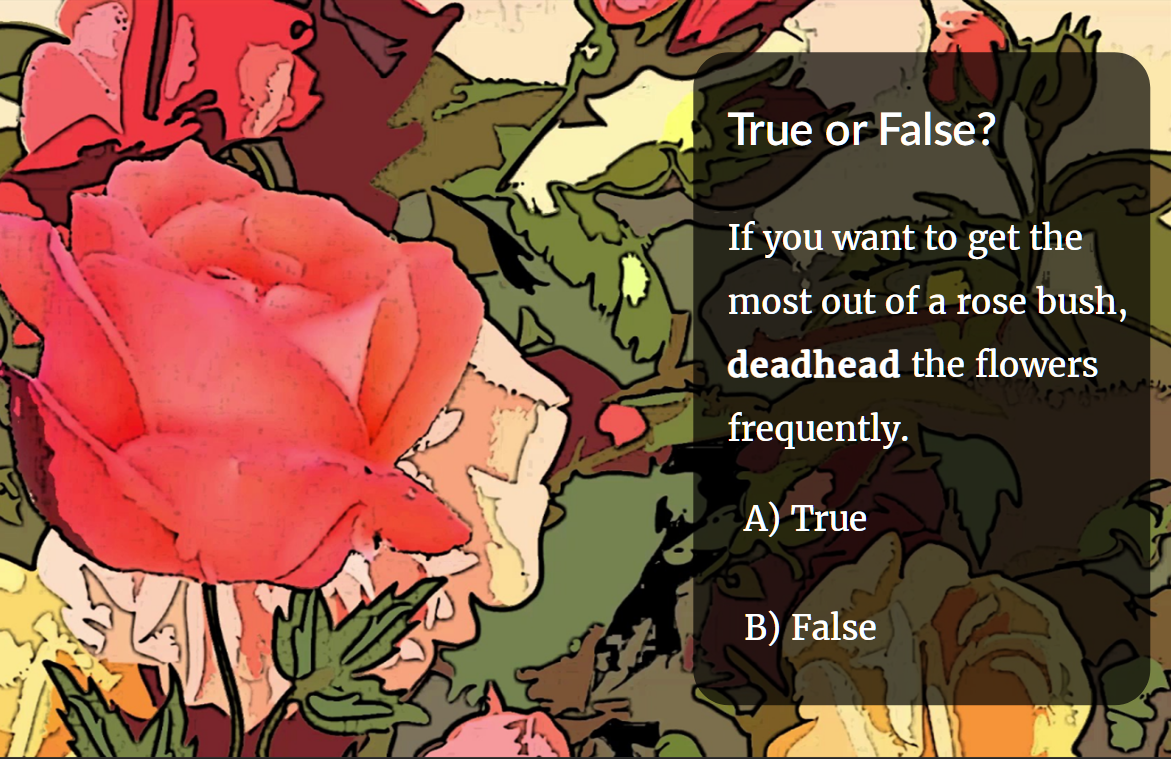
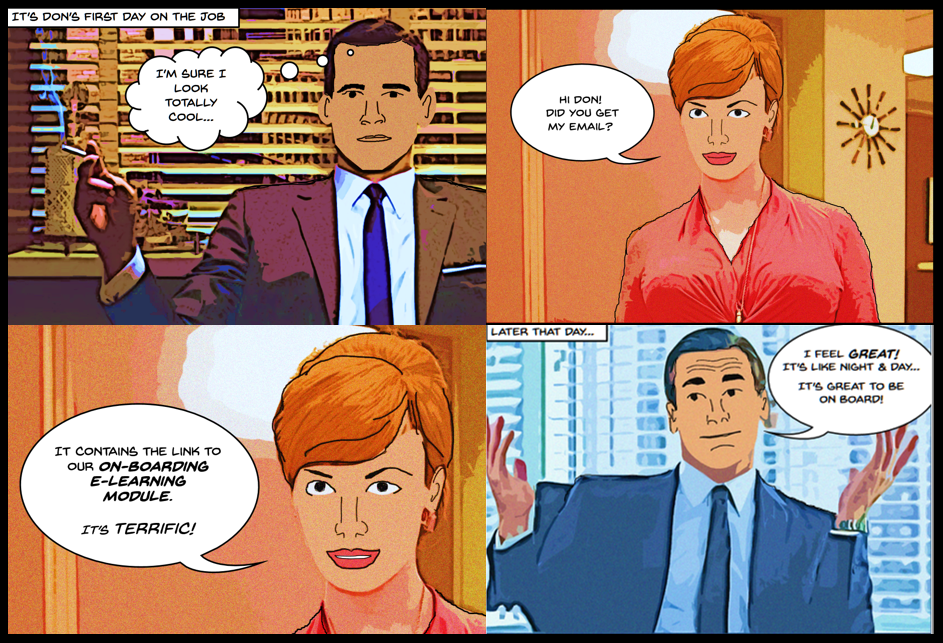
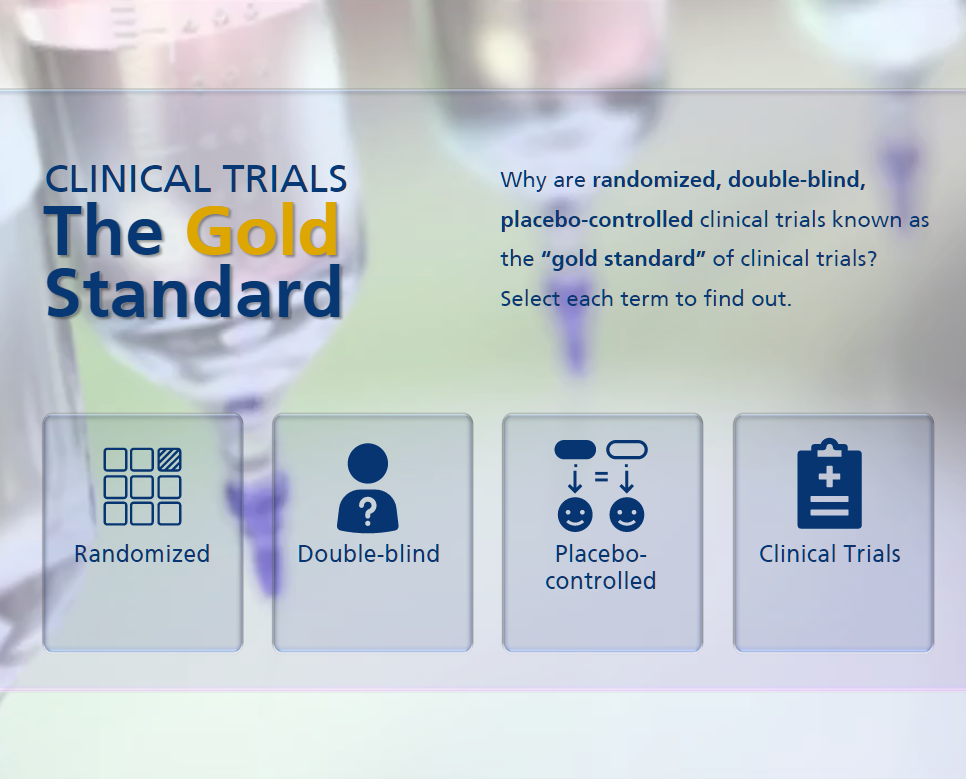
Why are randomized, double-blind, placebo-controlled clinical trials known as the “gold standard” of clinical trials? Watch the demo to find out!

This demo is in response to Articulate’s E-Learning Heroes Challenge #310: Using Glassmorphism in E-Learning Course Design. Glassmorphism is sometimes called the frosted or virtual glass look in UI design. The idea is to have a background-blur on an object, giving the impression of a frosted glass.

Select the image below to view the demo.

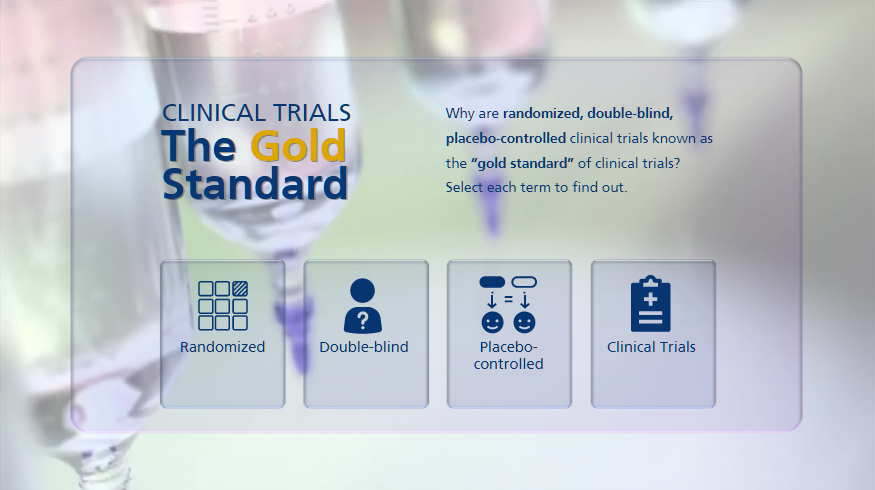
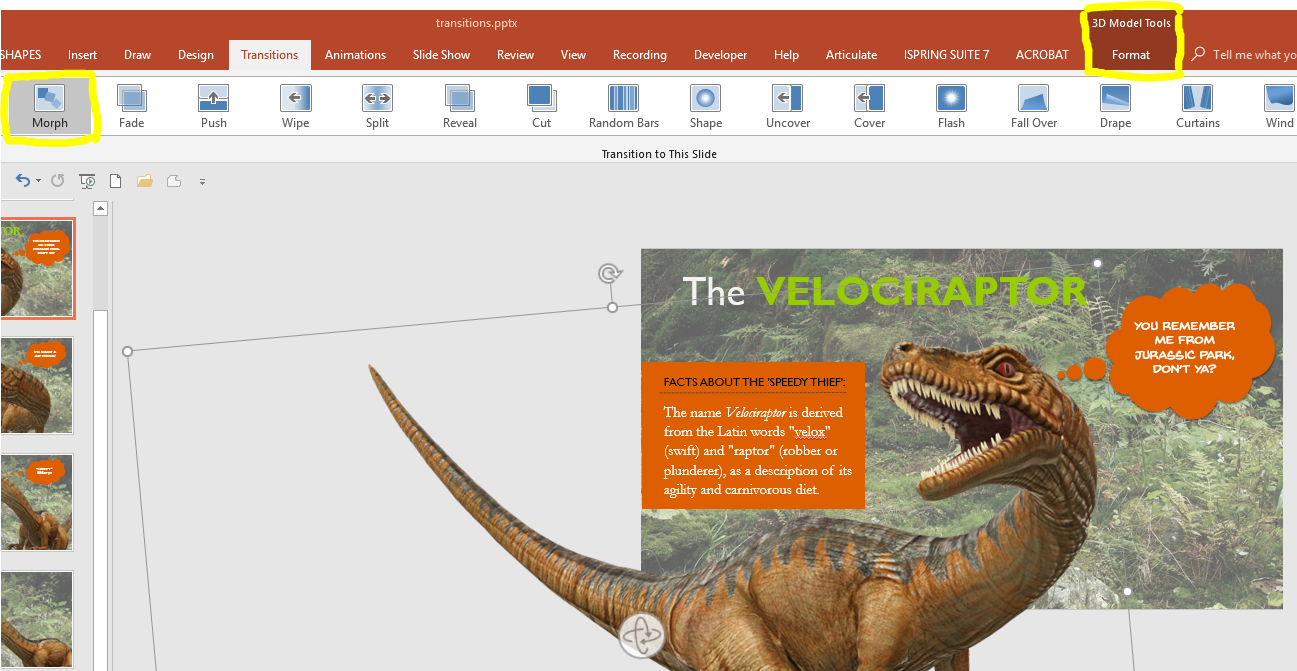
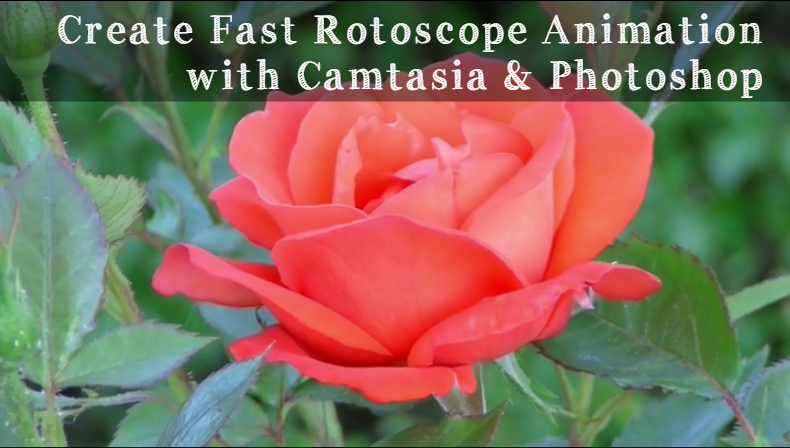
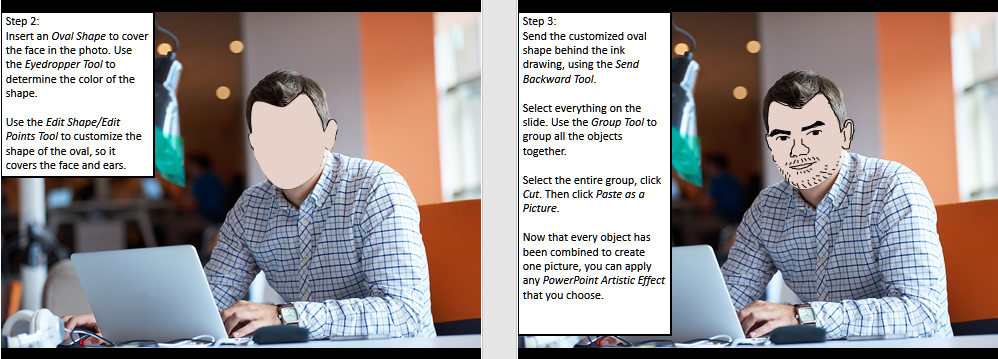
Tutorial: Create a Quick Frosted Glass Effect with PowerPoint
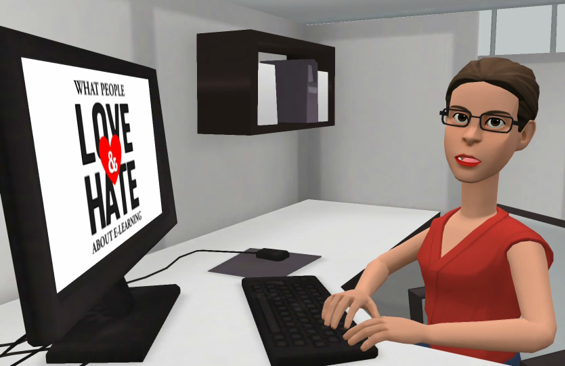
Authoring Tools

Storyline 360, the Articulate Content Library, PowerPoint, and Camtasia.

Free Print Certificate Template

Preview: View the interactive demo of the Print Certificate template in action!

*Updated 8/16/22 – a new Storyline 360 version has been added to the download links below. The short video in this version was created with CreateStudioPro.

A couple of years ago a client requested a printable certificate option for a Storyline assessment module I was designing. Since Storyline does not have that option, I had to scramble to create the feature. Of course, I did a google search first, and found many different tutorials on the subject.

It turns out there are various ways to create a printable certificate, using JavaScript with Storyline! This example is just one way to go about it.

Two free downloads: The zipped folders each contain the .story file, the printCertificate.html file, and the Storyline output folder.

Customize:  To customize the look of the Certificate, edit the printCertificate.html file with any html editor, such as Dreamweaver or Notepad.

Remember: Be sure to insert the printCertificate.html into the Storyline output folder after you publish your Storyline module.  Otherwise, the print certificate function will not work! (See the example Storyline output folder in the zip file you downloaded).

Tip: Be sure to pay attention to your browser and/or printer settings before printing or saving the certificate as a PDF. You can control the margins, the header and footer information, and the orientation of the certificate page by adjusting your browser and/or printer settings.

For example, in the Chrome browser (image below), you can uncheck the “Headers & Footers” option to print your certificate without that extraneous information at the top and bottom of the page.

3D Velociraptor

The Velociraptor is my submission to Articulate’s E-Learning Heroes Challenge #347: Using 3D Models in E-Learning.

Authoring Tools

To create the LinkedIn promo for this demo, I used an animation application new to me, called CreateStudio.

I created the Velociraptor demo in PowerPoint, using the application’s 3D Model Tools, morph slide transitions, & applied zoom & fly-in animations to the text boxes.

I did a screen capture of the PowerPoint slide show with Camtasia, then added music, sound effects, and an animated end title sequence with the video-editing software. (I’ve found that saving a PowerPoint slide show as a video does not give me as high a quality video as doing a screen capture, when there are many slide transitions and animations in the presentation.)

Free Download!

PowerPoint comes with plenty of free templates and themes. When you open the application, you can search for templates in various categories, as shown in the image below. I searched in the Education category, and found this school report template, which I modified for this presentation. To check out how the morph transition works, you can download the template here: Velociraptor PowerPoint template.

Bonus Download!

It is possible to create 3D promos for your work, using PowerPoint. The example above was made with PowerPoint and exported to video.

Download the editable PowerPoint version here.

Vector Graphics in eLearning

Articulate’s eLearning Challenge #376 is Creating eLearning Templates from Vector Graphics. Vector graphics are infinitely scalable images created using mathematically defined elements. This means you can make a vector graphic as large or small as you want without losing any quality. It also means that vector images are great to use in eLearning courses.

PowerPoint has mix-and-match vector illustrations and cartoons available to use in the stock images included with the application. I colorized these cartoons by right-clicking on the image to convert it to individual shapes, then selected a fill color for each shape.

To create the Billy goes to the Hospital presentation above, I used PowerPoint vector cartoons and vector backgrounds from eLearning Art, then I saved the PowerPoint as a video. This low-cost technique could be used to create scenarios for eLearning courses.

For the Practical Math video below, I used vectors from Freepik in PowerPoint. Using PowerPoint’s animation effects helps create a parallax effect. This example is a short preamble to an eLearning math course.

Download the Freebies!

Download the Editable PowerPoints

To learn more about working with vector images, I recommend Tom Kuhlmann’s YouTube video tutorial.

Rotoscoping Animation

Articulate’s E-Learning Heroes Challenge #329 is Using Video Backgrounds in E-Learning. This is an example of a Rotoscoping Animation video.

Select the image below to see the Storyline demo.

Tutorial

To see how I created this animation demo in about 20 minutes, using Camtasia and Photoshop, select the image below.

Learn how to export video files or image sequences from Photoshop:

https://helpx.adobe.com/photoshop/using/saving-exporting-video-animations.html

Authoring Tools: Camtasia 2018, Photoshop, Storyline 360

Interactive Infographic

Updated – June 6, 2019:

I discovered the original interactive infographic I submitted to the Articulate challenges years ago was no longer working correctly. I took this opportunity to update the infographic to Storyline 360, and create a new video for the project.

I believe this presentation was the first of mine to make it to the Articulate eLearning Examples page! Click the image below to view the demo.

Challenge #236 is an interactive infographic challenge. For the challenge, I created an interactive poster as my infographic, available on one page, rather than a multi-page e-learning module. The very simple design is similar to Pinterest tiles. I used Plotagon animation to create the animated characters, and made the owl out of PowerPoint shapes.

Tutorial: Learn How to Re-size the Storyline Slide:

I decided to use a portrait orientation to give it the feel of a poster. Storyline makes it easy to change the size and orientation of your presentation. To change your Storyline module’s size, click on the STORY SIZE button, shown below, and choose either a preset size, or go with a custom size.

change the story size


Authoring tools: PowerPoint, Plotagon animation, Camtasia video editing & Storyline 360.

Create Common Craft Style Characters with PowerPoint

Click the image above to view the tutorial I created as a response to Articulate’s E-Learning Heroes Challenge #170. The challenge was to create and share your own “hand-crafted” explainer video, similar to a Common Craft style video. In my tutorial, I’ll show you how to create Common Craft style graphics in less time than it takes to hand-draw and cut out images, using PowerPoint shapes and shadow effects. Click the image above to view the tutorial.

Using the Paper Cutout Effect to Design E-Learning Graphics – Articulate Challenge #235

Update: The same technique can be applied to photos for a paper cutout effect!

PowerPoint Freebie!

Click here to download the PowerPoint with all the graphics in the tutorial above.

Authoring tools: PowerPoint, Camtasia, Storyline 360

Tabs Navigation – ELH Challenge #199

4 Benefits of Donating Blood is my submission to Articulate’s Challenge: Common E-Learning Interactions: Tabs Navigation (2018) #199

Leveraging a Free Tabs Download

I created this new tabs interaction by revamping a free tabs template download created and made available on the Articulate community website by Montse Anderson.

The Benefits of Fruits template is a Storyline 2 template. I upgraded the template to Storyline 360, then changed the colors, fonts, graphics, text, and added text-to-speech audio with background music.

Free Downloads!

Download the Storyline 360 template by clicking here: Tabs Navigation

I used the font Caviar Dreams for the text. To create the cartoon characters, I used the fonts Kartoon Kutz, and Kartoon Kutz 2. Download all three fonts: 3 Fonts

I used PowerPoint to create the cartoon images from Kartoon Kutz fonts. Get the PowerPoint file by clicking here: Font Characters

Tutorial

In The Rapid E-Learning Blog, author Tom Kuhlmann created a great tutorial showing how to create free icons and images using fonts: Create Free Icons and Images in PowerPoint Using Dingbat Fonts

Authoring tools: Storyline 360, PowerPoint

Creative Image Effects – Challenge #156


This is my entry for Articulate’s E-Learning ELH Challenge #156: Creative Image Effects for Stock Photos in E-Learning. Click the image above to view the Mad Men-inspired demo.

Tutorial/PowerPoint Download

I used PowerPoint to create the comic book photo effects shown in the demo, using the steps shown below. To download the PowerPoint Photo Effects Step-by-Step zip folder, click here.


Authoring Tools: PowerPoint, Articulate Presenter 360

Rotoscoping Animation for E-Learning Courses #167

Articulate’s E-Learning Heroes Challenge #167 is all about creating a rotoscoping animation demo for e-learning courses. To see my demo, click the image below.

I had actually never heard the term “rotoscoping animation” before, but when the classic Take On Me music video from the ’80s was referenced, I recalled the cool hand-drawn animation effect that was used.

Rotoscoping is a technique used by animators, where they trace over motion picture footage, frame by frame, when realistic action is required. I wanted to try to replicate the effect. The problem is, it takes a long time to do that!

Since I don’t have time to spend several hours on producing this effect for e-learning, I tried using a shortcut involving PowerPoint’s Artistic Effects filters. 

Tutorial

I created my “rotoscoping animation” effect in less than half an hour! To view the tutorial on how I did it, click the image below.

Authoring Tools: PowerPoint 2016, Storyline 360